
In this article
A useful Gemini AI photo prompt says whether you want a new image or an edit to a supplied photo. For an edit, identify what must stay the same before describing the change. For a new image, define the subject, setting, light and final use.
The prompts below are original examples you can adapt. They include instructions for portraits, product scenes and presentation layouts, plus follow-up requests for fixing a particular problem.
What to take away.
Distinguish a new image from an edit to an uploaded photo.
Name the details to preserve before describing changes.
Review the downloaded result, including its crop and implied meaning.
Start with an image request in Gemini
Open Gemini and use its image feature, then enter a prompt or upload the photo you want to edit. Google documents both creation and editing in its Gemini image guide. Access depends on your account and region.
Before uploading a portrait or product photo, decide which details are essential: identity, expression, product shape, label wording or camera angle. State them as constraints. Review the result against the original; a prompt does not guarantee exact preservation.
Download the prompts and original reference images
Use the photo-prompt collection (TXT) for the portrait, cup and workshop exercises below. It includes the exact generation and edit requests, plus what to inspect after each result. Download the portrait reference, cup reference or workshop first result to try the matching edit yourself.
The visual examples on this page were made with OpenAI’s image generation tool, not Gemini. Both the reference and edited images are synthetic. They illustrate the requests and review process; they do not show what Gemini will produce. Use the prompts in Gemini and record the actual app and date beside your own results.
Describe the change and the details to preserve
Use this structure: “Use {attached image or new subject}. Preserve {details}. Change {specific element}. Use {lighting and style}. Compose for {shape and placement}. Do not add {unwanted details}.”
For a new image, replace “preserve” with a description of the subject. Give visual instructions rather than a long list of flattering adjectives. “Soft light from a window on the left” is more useful than “make it amazing.”
Portrait prompt: change the setting, keep the person recognizable
“Use the attached portrait. Keep the person’s facial features, expression and hairstyle recognizable. Replace the background with a simple, softly lit office. Keep the camera at eye level and the clothing unchanged. Leave space above the head for a square profile crop. Do not add text or change the person’s age.”
Compare the face, hairline, clothing and any accessories against the original at full size. If a detail changed, name it in the next request rather than regenerating the whole scene with a longer style prompt.
In this demonstration, the plain background becomes a softly lit office while the glasses, olive shirt and curly hair remain recognizable. That is an observation about these two images, not a guarantee of identity preservation. Compare the face at full size before accepting a similar edit. Download the edited portrait.


Product prompt: build a scene around the supplied item
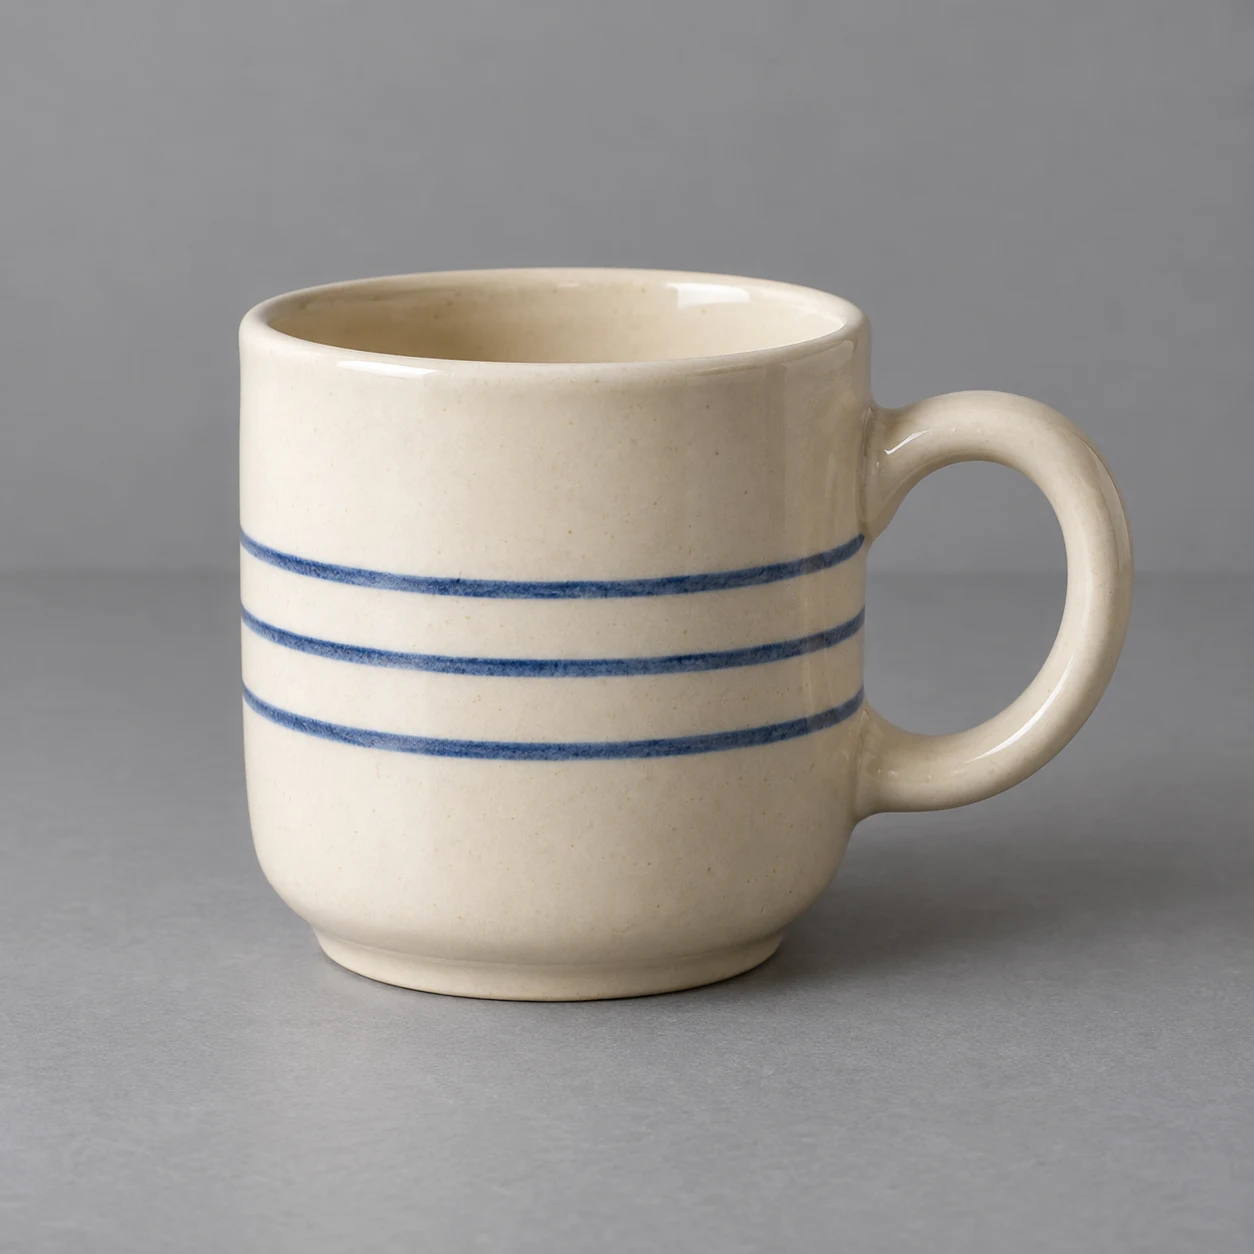
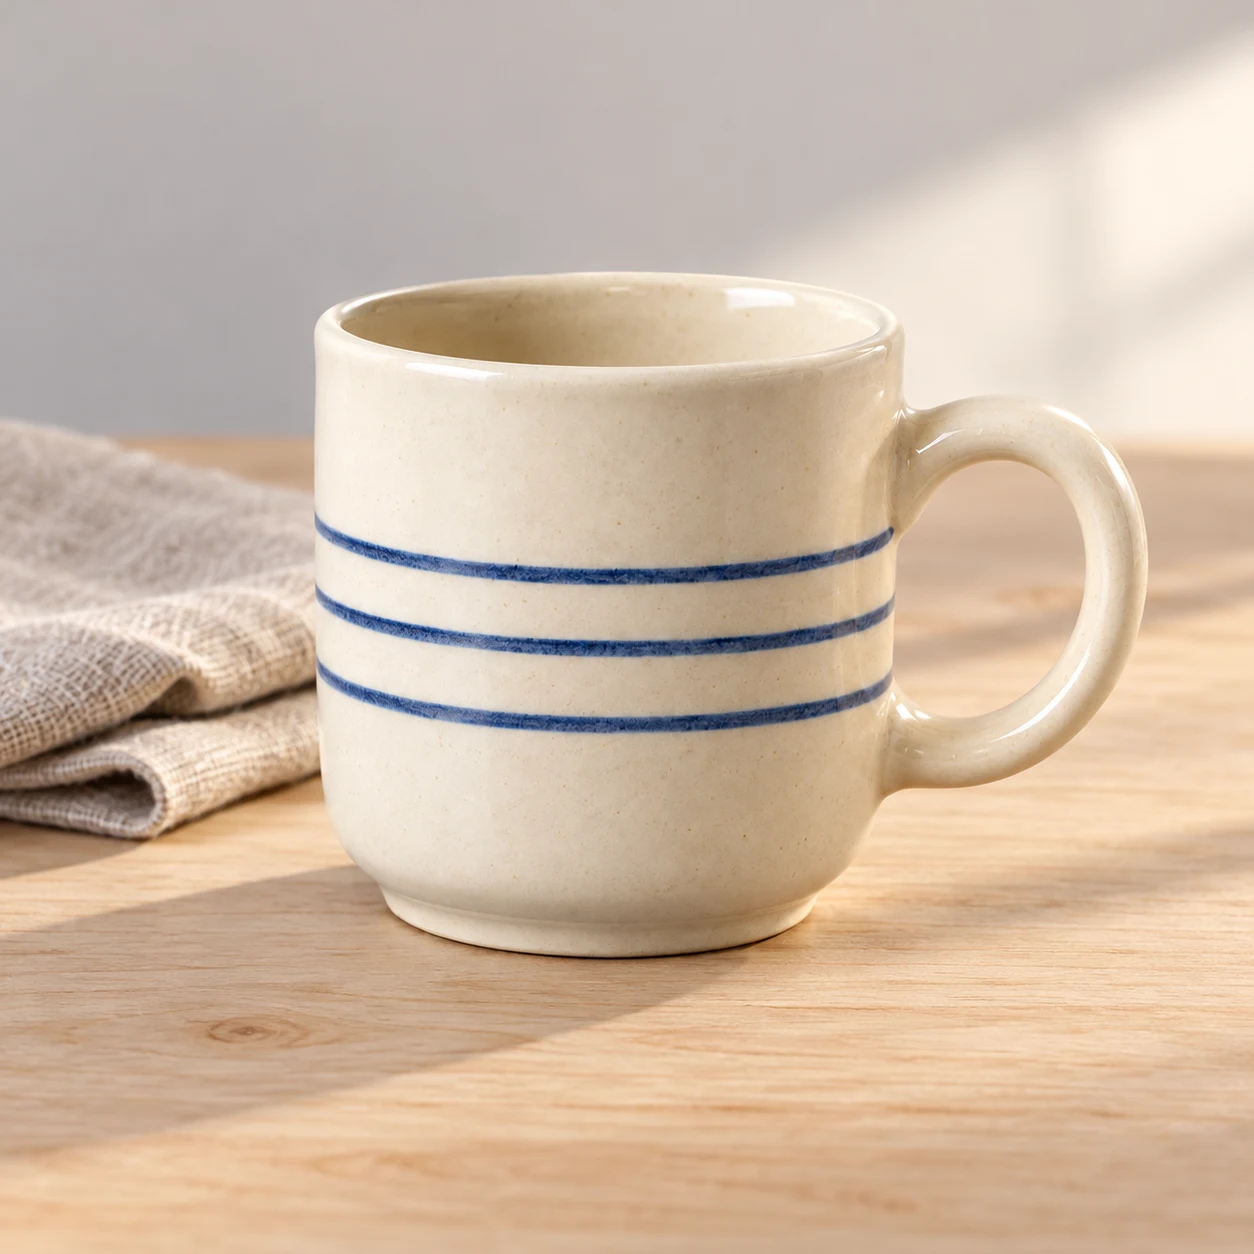
“Use the attached ceramic cup as the product reference. Preserve its silhouette, handle and surface pattern. Place it on a pale wooden table beside a folded linen napkin. Use soft morning light from the right. Keep the cup fully visible and the background uncluttered. Do not add a logo, slogan or another cup.”
Inspect the rim, handle connection and pattern. A visually attractive result can still misrepresent the product. Use an original product photograph when the image must document the exact item being sold.
The edited example keeps three blue stripes and a right-hand handle, but the cup occupies less of the frame and its proportions may differ. The new setting is useful as a concept scene, not as proof that an exact product has been preserved. Download the edited cup scene and compare it with the reference.
Presentation prompt: leave usable space for the headline
“Create a wide editorial photograph of a small community workshop with tools neatly arranged on a workbench. Put the main activity on the right and leave a quiet wall on the left for a headline added later. Use natural light and believable materials. No labels or text inside the image.”
Specify the intended shape, then check the downloaded dimensions and crop. A request for 16:9 does not prove that the exported file or the visible crop has that ratio. Keep important details away from the edge.
The first generated workshop leaves a wall on the left, but a plant and stool still occupy its edge. A targeted follow-up is: “Keep the workshop, people, workbench and natural lighting on the right unchanged. Remove only the plant and stool at the left edge. Leave the left third as a quiet wall and floor for a headline added later. Keep the wide composition. Do not add text.”
The revised example removes those two objects. Add your headline as editable text in the slide editor and check the result at presentation size. The downloaded examples are 1672 × 941 pixels, close to 16:9; inspect the final crop rather than assuming an exact match. Download the revised workshop.


Revise one visual problem at a time
If the framing is wrong: “Keep the scene and lighting. Move the cup to the right third and leave clear space on the left.” If an object changed: “Restore the handle shape from the reference; keep the new background.”
If a result contains misspelled words, remove the generated lettering and add editable text in the destination editor. For a series, carry forward the accepted lighting, camera position and palette while changing the subject that the next image needs to explain.
Download the image and inspect the final use
Download the accepted result from Gemini and check it at the size you will publish. Look for altered details, awkward crops and unintended implications. A generated concept image should not be presented as a photograph of an event that actually happened.
For other tools and a separate Syaxis Chat route, use the AI photo editing and image revisions. When you later request a presentation, identify the accepted images and the role each should play.
FAQ
Can a Gemini prompt guarantee that a face or product stays identical?
No. Compare the output with the reference and use the original image when exact identity or product detail is required.
Why does my image not fit the slide?
The requested ratio, downloaded file dimensions and visible crop can differ. Check the actual file and leave enough space around important details before placing it.
How do I make related images consistent?
Reuse an accepted reference and a short list of lighting, camera and palette decisions. Change one subject or composition requirement at a time and review the series together.
Bring it into your work.
Start with one photo or clearly defined subject, request a bounded change and inspect the result. Reuse the accepted visual decisions for the next image.
How we prepare our guides
Syaxis uses AI to assist with drafting and translation. Comparisons draw on linked sources; they are not hands-on tests unless a test method is described. Worked examples are illustrative unless identified otherwise.


